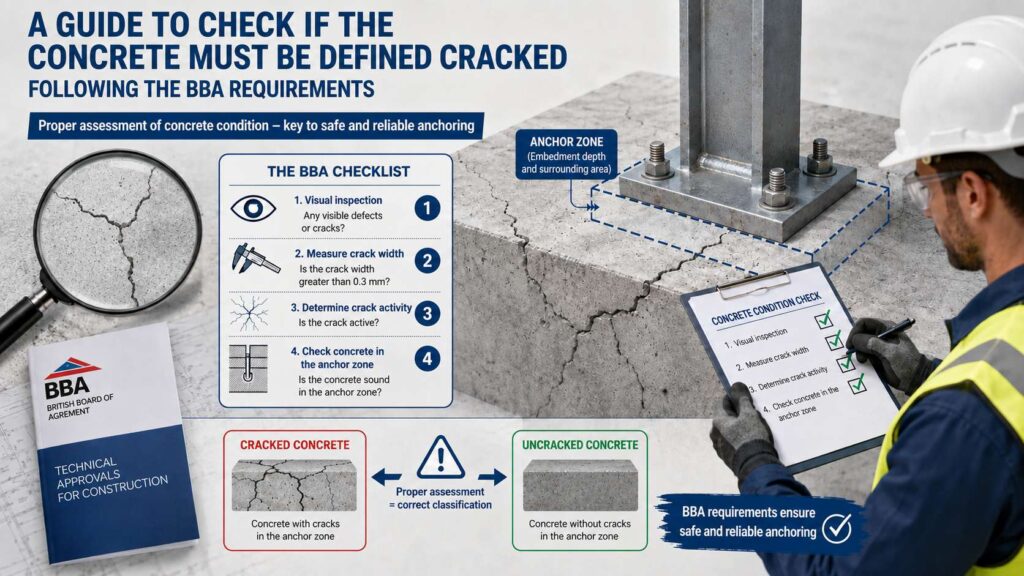


Cracked or uncracked concrete? BBA Guidance No. 39
12 בJuly 2026
Bolt and nut tightening test methods – the On-Off-On method
12 בJuly 2026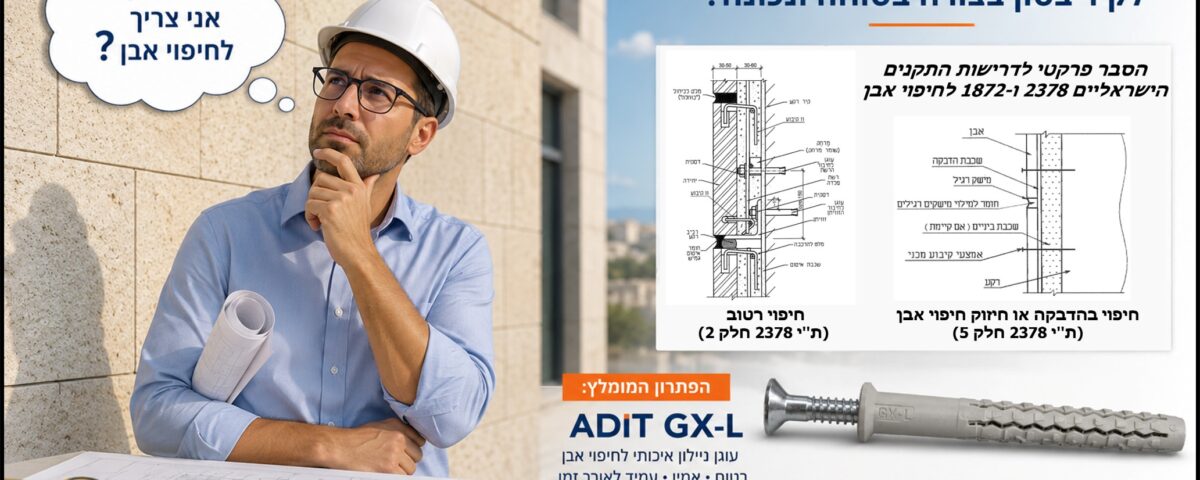
What Anchor Is Suitable for My Stone Cladding?
Stone cladding — natural or artificial — has to be anchored to the wall behind it. In Israel the requirements come from Standard SI 1872, and the right anchor depends on the cladding method and the background material.
Three cladding methods under SI 1872
- Wet cladding — traditional cladding set in a cement bed with reinforcing mesh and angle anchors, mainly for natural stone.
- Adhesive plus mechanical fixing — each unit bonded and also held by a mechanical anchor. This is the most common method today.
- Strengthening existing cladding — adding mechanical anchors to old cladding that was only bonded (SI 1872, clause 4.7).
Wet cladding — the fixings required
SI 2378 part 2 / SI 1872 part 2. In wet cladding the stone is held in a cement bed reinforced with a mesh, and the mesh and the support angle both have to be mechanically fixed back to the backing wall. The method is used mainly for natural stone in older construction, but it is still in wide use.
| Component | Recommended product | Coastal areas | Notes |
|---|---|---|---|
| Support angle (bottom support) | ORA-G M12×110 | MTH A4 M12×110 | A4 stainless — suitable for a marine environment |
| Plug for the mesh | GX-L M10×80 | GX-L M10×80 | Includes a cap that covers the head of the plug |
| Screw for the mesh | 8×100 hot-dip galvanised | 8×100 stainless | Near the sea, stainless is mandatory |
| Washer | 40×8 hot-dip galvanised | 40×8 stainless | Spreads the load over the mesh |
Calculating the GX-L length when the mesh sits more than 2 cm off the wall. Where the mesh is held further than 2 cm from the backing wall — because of a waterproofing bed, for example — the GX-L has to be long enough to reach a minimum embedment of 5 cm in concrete, 5 to 8 cm in hollow concrete block, and 7 cm in Ytong or lightweight block.
When bonding alone is permitted
Under SI 1872 part 4 (2017) and SI 2378 part 4, every bonded cladding — natural or engineered stone — must also carry a mechanical fixing, except in defined cases. Bonding on its own is allowed:
- On exterior cladding, up to 1.5 m above floor or ground level.
- On interior cladding, up to 2.0 m above floor level.
- In both cases only if the unit weighs no more than 15 kg and no edge exceeds 800 mm.
- Up to a height of 29 m — but only subject to a detailed engineering design, with a modulus of elasticity of at least 20,000 MPa, a unit area of at least 0.02 m², and a C2TES2 adhesive.
What the standard requires of the anchor
- A pull-out capacity of at least 1,500 N (per SI 414, with a safety factor of 4), and greater than the strength of the background.
- At least 2,000 N at any single fixing point (clause 4.7.1.7).
- A minimum screw diameter of 6 mm, measured on the unthreaded shank of the screw, with no exceptions.
- A minimum embedment into the background of 50 mm in concrete, and more in hollow blocks (clause 4.7.3).
- The anchor is set at least 3 days (72 hours) after the unit is bonded, to let the adhesive gain strength.
- A prototype wall test is mandatory on projects larger than 100 m2.
The recommended anchor: GX-L M10 SS316
The Adit GX-L M10 in SS316 meets these requirements: a polyamide body with an SS316 stainless screw (resistant to corrosion and suitable for coastal areas), a 6 mm screw diameter that meets the minimum, a pull-out capacity of 1,500 N, and approval ETA-08/0191. A cap covers the head of the plug after fixing for a neat, weatherproof finish. In marine environments the supporting angle is fixed with A4 stainless hardware (for example ORA-G with an A4 stud).
Minimum GX-L embedment by substrate
When the stone surface stands more than 3 cm off the wall, calculate the plug length so that the embedment is at least:
| Background | Minimum embedment |
|---|---|
| Concrete | 5 cm |
| Hollow concrete block | 5.5 – 8 cm |
| Ytong / aerated block | 7 cm |
Installation: adhesive plus mechanical fixing
- First drilling (before bonding) — drill the unit to suit the planned anchor.
- Second drilling for the screw head — with a diamond core, about 4 mm into the face of the unit, so the head sits flush.
- Bond the unit — butter both the back of the unit and the substrate; the adhesive layer should be 5-10 mm thick.
- Wait at least 72 hours before the mechanical fixing.
- Set the anchor — clean the hole, insert the screw with its anchor stud, and plug the head recess with a matching piece of stone or with cement.
Testing
Confirm the anchors on site with pull-out tests validating a capacity of at least 1,500 N:
| Cladding area | Anchors to test |
|---|---|
| Up to 300 m2 | 6 |
| 301 – 3,000 m2 | 10 |
| Each additional 5,000 m2 | +6 |
Before work begins, build a prototype wall of at least 12 m2 (required unless the cladding area is under 100 m2) and have an approved laboratory validate the materials, carry out a visual examination and test the pull-out capacity.
Adhesive category (SI 1872, Table 1)
| Background tensile strength | Exterior | Interior |
|---|---|---|
| 0.5 – 0.7 MPa | C2 TE S2 | C1 T S2 |
| Above 0.7 MPa | C2 TE S1/S2 | C1 T S1/S2 |
Anchor quantity and position
| Unit condition | Anchors | Position |
|---|---|---|
| Standard unit (weight ≤ 15 kg, no edge > 800 mm) | at least 1 | symmetrical about the unit’s centre of gravity |
| Heavy unit (weight > 15 kg or an edge > 800 mm) | 2 | spacing between anchors = 0.6 × unit length |
| Unit on a soffit / underside (horizontal) | 1 anchor (edge ≤ 350 mm) 2 anchors (edge > 350 mm) | an intermediate joint every 3 m |
The anchor is installed at least three days after bonding, so that the adhesive has hardened and holds the unit while the hole is drilled.
Drilling and assembly, step by step
- First drilling — before bonding, recommended. Drill slowly and without hammer action through the unit. The hole diameter suits the intended anchor.
- Second drilling — for the screw head. Drill with a diamond cup to a depth of 4 mm from the face of the unit, so the screw head sits recessed.
- Bond the unit. Double buttering — adhesive applied both to the back of the unit and to the substrate. Adhesive thickness after pressing: 5–10 mm.
- Wait three days. At least 72 hours after bonding before the mechanical fixing is installed.
- Clean the hole and install the anchor. Clean the hole, then thread the screw with the plug into it. The hole is sealed with a plug of the same material as the unit, or with cement pointing.
- Cover the head so the fixing is concealed and protected.
What the anchor itself must satisfy
- Plug body: polyamide (nylon).
- A support “tooth” 9 mm thick on units up to 15 mm thick.
- Screw: stainless steel SS316 in every case — the Israeli standard forbids both cold and hot galvanising for the mechanical fixing of cladding.
- It must hold a European Technical Assessment (ETA).
- A technical datasheet and an approved laboratory certificate must be supplied with it.
SS316 is also designated S31600 under the UNS system (ASTM E527).
Execution checklist — bonded cladding with mechanical fixing
- Engineering design approval received, including the mechanical fixing details.
- Anchors verified against ETA-08/0191 and the requirements of SI 1872 part 4.
- Screws confirmed as SS316 — not galvanised.
- Prototype wall built and bond strength test passed at ≥ 0.5 MPa.
- Anchor pull-out force ≥ 1,500 N and bearing capacity ≥ 2,000 N verified.
- First hole drilled before bonding, in most cases.
- Double buttering — adhesive on the back of the unit and on the substrate.
- 72 hours (three days) waited after bonding before the anchor is inserted.
- Screw head recessed 4 mm below the face of the stone.
- Screw head covered with a plug or cement pointing.
- Anchor test results documented in writing and signed.
Strengthening old cladding
Stone cladding that was only bonded, with no mechanical fixing — common in construction until the 2000s — can detach over time as the bond deteriorates. Adding mechanical anchors, designed and detailed by an engineer to SI 1872, brings it back within the standard.
Recommended product for strengthening — GX-L M10×100 SS316. A stainless plug for existing cladding: the extra length lets it pass through the stone and all of the old cladding layers and still reach a proper embedment in the backing wall.
Alternative on a concrete wall — ADIT PS 7.5 SS316. Subject to the designer’s approval, and on a concrete backing wall only, the ADIT PS 7.5 SS316 stainless concrete screw can replace the nylon plug when strengthening existing stone cladding:
- Threads straight into the concrete — no separate plug, so installation is simple and fast.
- Made of SS316 stainless steel — fully corrosion resistant.
- Minimum drilled depth in concrete: 5 cm.
- Suited to older stone cladding whose backing wall is concrete.
Key points
- Wet cladding: ORA-G angle bracket plus GX-L plug for the mesh; near the sea, everything in stainless steel.
- Bonded cladding: every unit must also have a mechanical fixing, except small units up to 1.5 m height.
- Screws: SS316 only. The standard prohibits cold or hot galvanising for the mechanical fixing of cladding.
- Required pull-out force: ≥ 1,500 N. Bearing capacity: ≥ 2,000 N.
- Screw penetration into the substrate: minimum 50 mm in concrete, deeper in blocks.
- The anchor goes in at least three days after bonding.
- For projects over 100 m², a prototype wall test is mandatory.